Matter nRF Connect Pigweed Example Application
Contents
Matter nRF Connect Pigweed Example Application#
The nRF Connect Pigweed Example demonstrates the usage of Pigweed module functionalities in an application.


The example is based on Matter, the Pigweed module, which is a collection of libraries that provide different functionalities for embedded systems, and Nordic Semiconductor’s nRF Connect SDK.
You can use this example as a training ground for making experiments, testing Pigweed module features and checking what actions are necessary to fully integrate Pigweed in a Matter project.
Pigweed functionalities are being gradually integrated into Matter. Currently, the following features are available:
Echo RPC - Creates a Remote Procedure Call server and allows sending commands through the serial port to the device, which makes echo and sends the received commands back.
Overview#
This example is running on the nRF Connect platform, which is based on the nRF Connect SDK and Zephyr RTOS. Visit Matter’s nRF Connect platform overview to read more about the platform structure and dependencies.
Pigweed libraries are built and organized in a way that enables faster and more reliable development. In the Matter project, the Pigweed module is planned to be used to create system infrastructures, for example for performing on-device tests, but considering its general functionalities, it can be useful also in other cases.
Requirements#
The application requires a specific revision of the nRF Connect SDK to work correctly. See Setting up the environment for more information.
Supported devices#
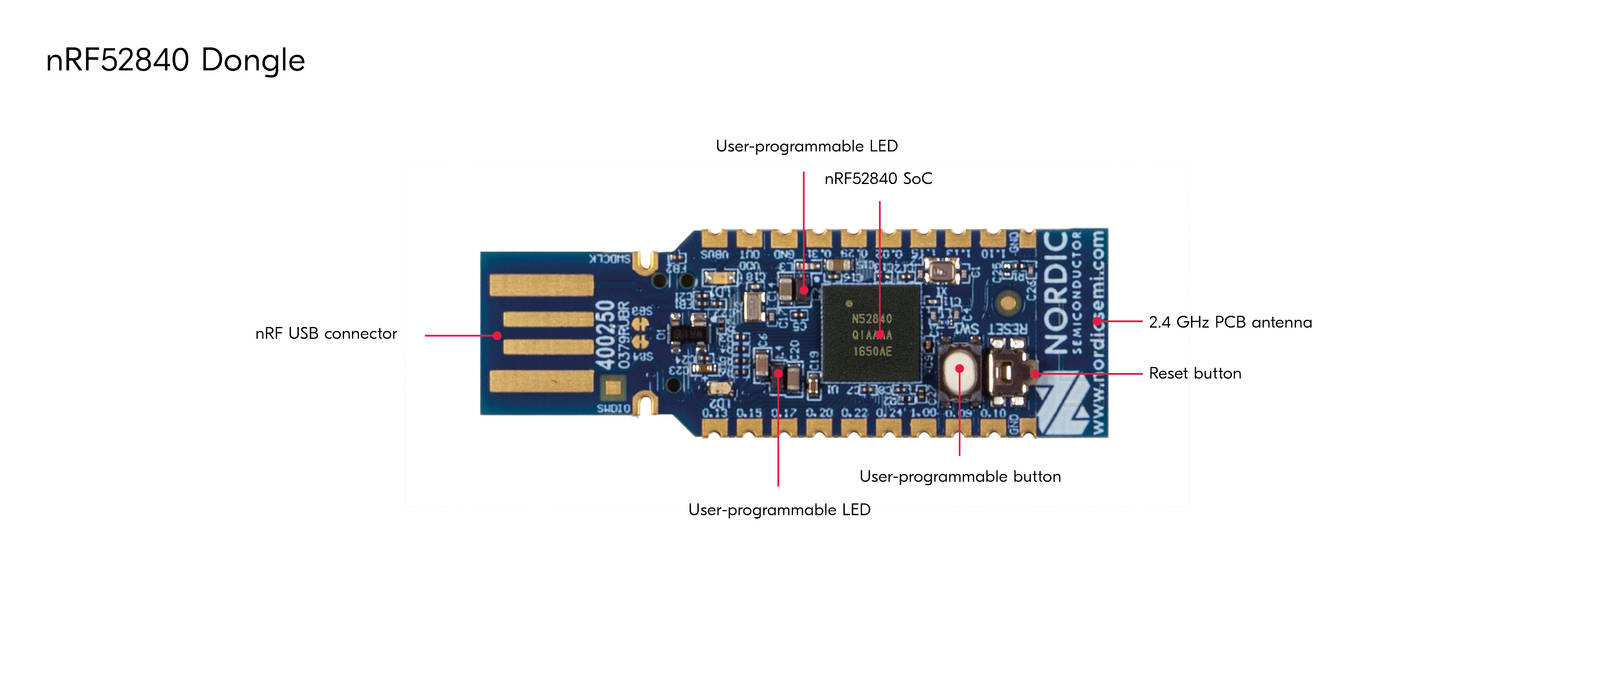
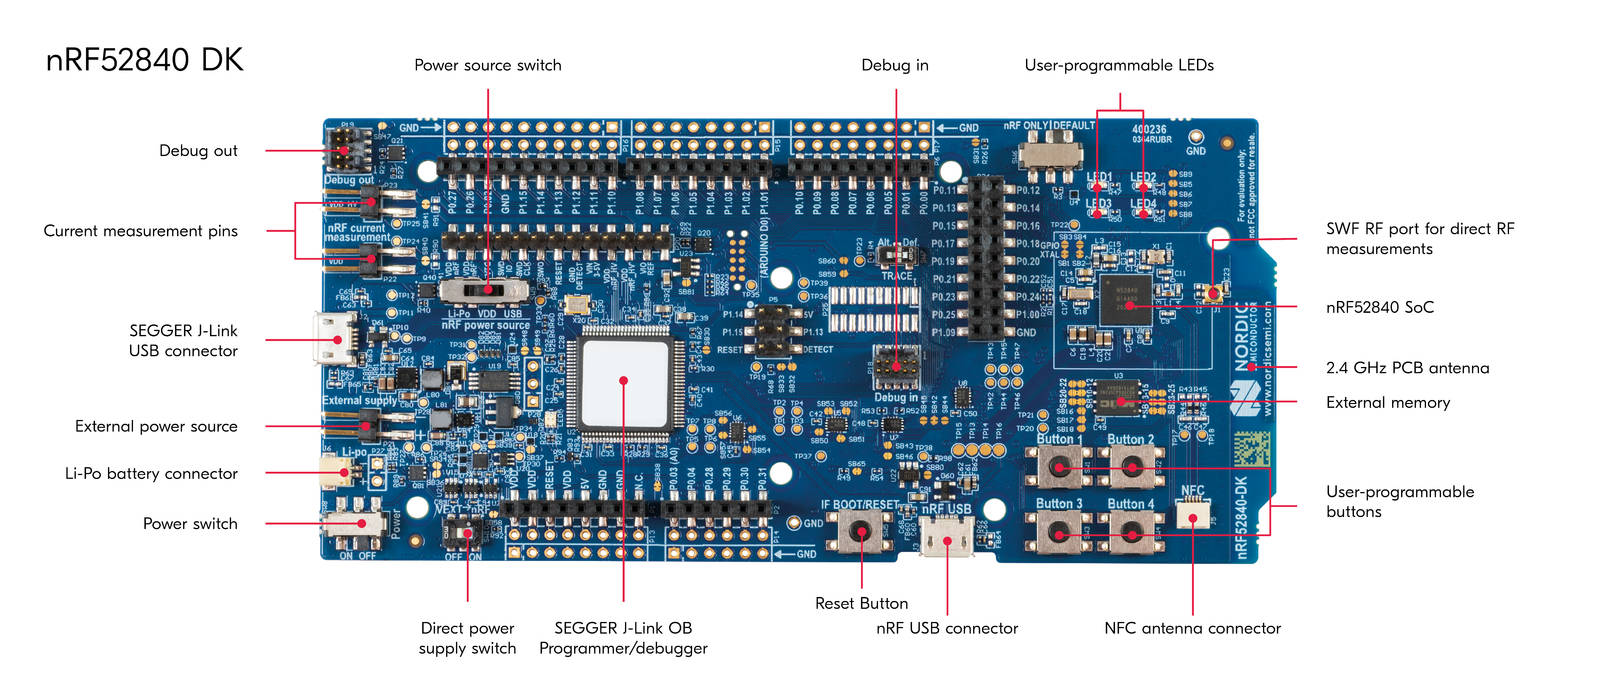
The example supports building and running on the following devices:
Hardware platform |
Build target |
Platform image |
|---|---|---|
|
|
|
|
|
Device UI#
This section lists the User Interface elements that you can use to control and monitor the state of the device. These correspond to PCB components on the hardware platform.
LED 1 shows the overall state of the device. The following states are possible:
Solid On — The application was flashed and ran successfully.
Serial port can be used to communicate with the device by sending commands and receiving responses.
Important:
Please note that supported hardware platforms are using different transport interfaces to perform serial communication, which leads to differences in configuration. By default, these interfaces are used:
nrf52840dk_nrf52840- UART interface routed to the SEGGER J-Link USB port.
nrf52840dongle_nrf52840- USB interface routed to the USB port.
Setting up the environment#
Before building the example, check out the Matter repository and sync submodules using the following command:
$ git submodule update --init
The example requires a specific revision of the nRF Connect SDK. You can either install it along with the related tools directly on your system or use a Docker image that has the tools pre-installed.
If you are a macOS user, you won’t be able to use the Docker container to flash the application onto a Nordic development kit due to certain limitations of Docker for macOS. Use the native shell for building instead.
Using Docker container for setup#
To use the Docker container for setup, complete the following steps:
If you do not have the nRF Connect SDK installed yet, create a directory for it by running the following command:
$ mkdir ~/nrfconnect
Download the latest version of the nRF Connect SDK Docker image by running the following command:
$ docker pull nordicsemi/nrfconnect-chip
Start Docker with the downloaded image by running the following command, customized to your needs as described below:
 $ docker run --rm -it -e RUNAS=$(id -u) -v ~/nrfconnect:/var/ncs -v ~/connectedhomeip:/var/chip \
     -v /dev/bus/usb:/dev/bus/usb --device-cgroup-rule "c 189:* rmw" nordicsemi/nrfconnect-chip
In this command:
~/nrfconnect can be replaced with an absolute path to the nRF Connect SDK source directory.
~/connectedhomeip must be replaced with an absolute path to the Matter source directory.
-v /dev/bus/usb:/dev/bus/usb –device-cgroup-rule “c 189: rmw”* parameters can be omitted if you are not planning to flash the example onto hardware. These parameters give the container access to USB devices connected to your computer such as the nRF52840 DK.
–rm can be omitted if you do not want the container to be auto-removed when you exit the container shell session.
-e RUNAS=$(id -u) is needed to start the container session as the current user instead of root.
Update the nRF Connect SDK to the most recent supported revision, by running the following command:
 $ cd /var/chip
 $ python3 scripts/setup/nrfconnect/update_ncs.py --update
Now you can proceed with the Building instruction.
Using native shell for setup#
To use the native shell for setup, complete the following steps:
Download and install the following additional software:
If you do not have the nRF Connect SDK installed, follow the guide in the nRF Connect SDK documentation to install the latest stable nRF Connect SDK version. Since command-line tools will be used for building the example, installing SEGGER Embedded Studio is not required.
If you have the SDK already installed, continue to the next step and update the nRF Connect SDK after initializing environment variables.
Initialize environment variables referred to by the Matter and the nRF Connect SDK build scripts. Replace nrfconnect-dir with the path to your nRF Connect SDK installation directory, and toolchain-dir with the path to GNU Arm Embedded Toolchain.
 $ source nrfconnect-dir/zephyr/zephyr-env.sh
 $ export ZEPHYR_TOOLCHAIN_VARIANT=gnuarmemb
 $ export GNUARMEMB_TOOLCHAIN_PATH=toolchain-dir
Update the nRF Connect SDK to the most recent supported revision by running the following command (replace matter-dir with the path to Matter repository directory):
 $ cd matter-dir
 $ python3 scripts/setup/nrfconnect/update_ncs.py --update
Now you can proceed with the Building instruction.
Building#
Complete the following steps, regardless of the method used for setting up the environment:
Run the
activate.shscript, regardless of the building strategy. The script is required for building the Pigweed library. Use the following command:$ source scripts/activate.sh
Navigate to the example’s directory:
$ cd examples/pigweed-app/nrfconnect
Run the following command to build the example, with build-target replaced with the build target name of the Nordic Semiconductor’s kit you own, for example
nrf52840dk_nrf52840:$ west build -b build-target
You only need to specify the build target on the first build. See Requirements for the build target names of compatible kits.
The output zephyr.hex file will be available in the build/zephyr/ directory.
Removing build artifacts#
If you’re planning to build the example for a different kit or make changes to the configuration, remove all build artifacts before building. To do so, use the following command:
$ rm -r build
Configuring the example#
The Zephyr ecosystem is highly configurable and allows you to modify many aspects of the application. The configuration system is based on Kconfig files and the settings can be modified using the menuconfig utility.
To open the menuconfig utility, complete the following steps:
Go to the example directory by running the following command, with the example-dir directory name updated for your configuration:
$ cd example-dir
Choose one of the following options:
If you are running the build for the first time, run the following command:
$ west build -b nrf52840dk_nrf52840 -t menuconfig
If you are running a subsequent build, run the following command:
$ west build -t menuconfig
If you are running menuconfig with ninja, run the following commands:
   $ cd example-dir/build
   $ ninja menuconfig
Changes done with menuconfig will be lost if the build directory is deleted.
To make them persistent, save the configuration options in the prj.conf file.
For more information, see the Configuring nRF Connect SDK examples page.
Flashing and debugging#
The flashing and debugging procedure is different for the nRF52840 DK and the nRF52840 Dongle.
Flashing on the nRF52840 DK#
To flash the application to the device, use the west tool and run the following command from the example directory:
$ west flash --erase
If you have multiple nRF52840 development kits connected, west will prompt you to pick the correct one.
To debug the application on target, run the following command from the example directory:
$ west debug
Flashing on the nRF52840 Dongle#
Visit Programming and Debugging nRF52840 Dongle to read more about flashing on the nRF52840 Dongle.
Testing the example#
Run the following command to start an interactive Python shell, where the Echo RPC commands can be invoked:
python -m pw_hdlc.rpc_console --device /dev/ttyACM0 -b 115200 --proto-globs $CHIP_ROOT/third_party/pigweed/repo/pw_rpc/echo.proto -o /tmp/pw_rpc.out
To send an Echo RPC message, type the following command, where the actual
message is the text in quotation marks after the msg= phrase:
rpcs.pw.rpc.EchoService.Echo(msg="hi")


